
Introduction
Welcome to the world of PowerPorcelain Grout, where high-quality tiling solutions are combined with innovation. You’ve come to the right spot if you want to use the best grouting materials for your tiling projects. We’ll explore the features, advantages, and application methods of PowerPorcelain Grout in this extensive guide, equipping you to complete your next tiling project with perfect results.
Why PowerPorcelain Grout?
PowerPorcelain Grout is unique in the industry because of its exceptional performance and adaptability. Either as a professional installer or as a do-it-yourselfer, selecting PowerPorcelain Grout guarantees a flawless tiling process and durable outcomes. This is the reason PowerPorcelain Grout ought to be your first pick:
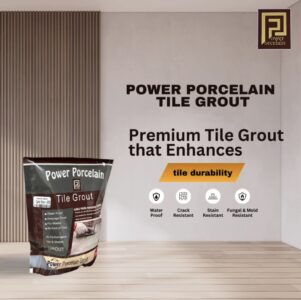
- Superior Durability: PowerPorcelain Grout is designed to endure the test of time and provides exceptional durability, so your tiled surfaces will remain intact even in high-traffic areas.
- Enhanced Stain Resistance: Bid farewell to discoloration and stains that just won’t go away. Because PowerPorcelain Grout is made with cutting-edge stain-resistant technology, cleaning and maintenance are simple.
- Excellent Colour Selection: PowerPorcelain Grout comes in a wide variety of colours, so you can tailor your tiling projects to your tastes and style.
- Easy Application: PowerPorcelain Grout’s smooth consistency and simple application method make it a pleasure to work with, saving you time and effort whether you’re grouting ceramic, porcelain, or natural stone tiles.
- Mould and Mildew Protection: PowerPorcelain Grout’s integrated mould and mildew inhibitors will keep your tiled surfaces looking brand-new and immaculate for years to come.
How to Use PowerPorcelain Grout:
Now that you are aware of PowerPorcelain Grout’s remarkable attributes, let’s examine how to apply it to your tiling projects successfully:
- Before applying the grout, make sure your tiled surface is clean, dry, and clear of any debris. PowerPorcelain Grout should be evenly filled into the joints using a grout float. Firmly press the grout to ensure complete coverage.
- Application: To avoid drying out, work in small sections and spread the grout diagonally across the tiles. To ensure full coverage, pack the grout firmly into the joints using a rubber grout trowel or grout float.
- Cleaning: Use a damp sponge to remove any excess grout from the tile surface after the grout has set for about 15 to 30 minutes. For a smooth finish, rinse the sponge in clean water often.
- Final Touches: To fully showcase the beauty of your tiled surface, use a dry cloth to buff away any haze or residue from the tiles after giving the grout a full day to cure.
Conclusion:
More than just a tiling product, PowerPorcelain Grout is an example of excellence, robustness, and creativity. For your tiling projects, you’re investing in superior performance and long-lasting results when you choose PowerPorcelain Grout. Take advantage of PowerPorcelain Grout’s power today to take your tiling projects to new heights of perfection.